It’s quite straightforward to sell your premium WordPress plugins and themes through PaddlePress PRO. We will walk through step by step on this guide.
Requirements
Self hosted WordPress site – (WordPress version 5.0+ and PHP 5.6+ is required)
Paddle Account – (If you don’t have an account you can apply on Paddle )
PaddlePress PRO – (assuming you already have, if not you can buy it from here)
1) Integrate your WordPress site to Paddle #
Follow installation and configuration steps to connect your WordPress site to your Paddle account.
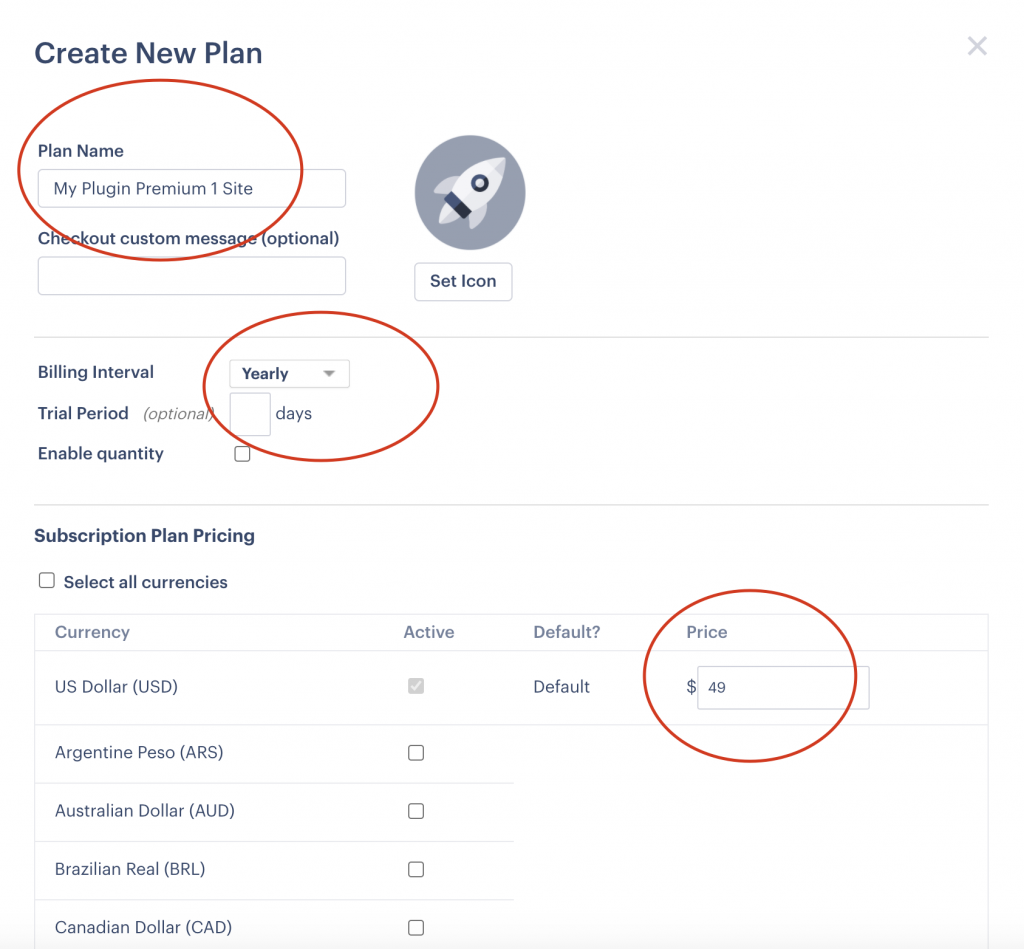
2) Setup Your Subscription Plans on Paddle #
Visit Paddle > Catalog > Subscription Plans and then create your subscription plans for each licensing options.
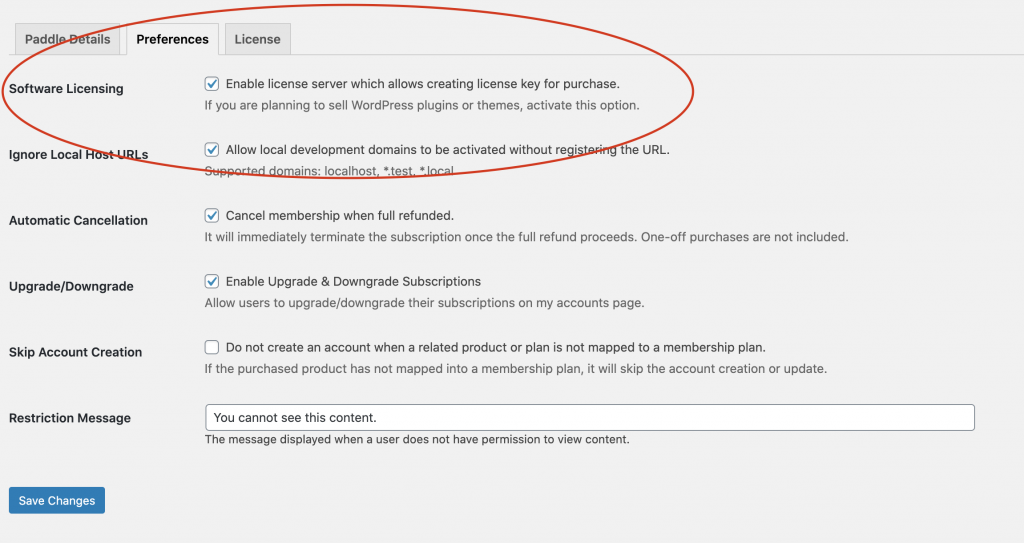
3) Enable Software Licensing #
Enable software licensing under WordPress dashboard > PaddlePress > Preferences . This will enable software licensing API and update server for providing auto-update functionality to your WordPress plugin or theme.
4) Create Membership #
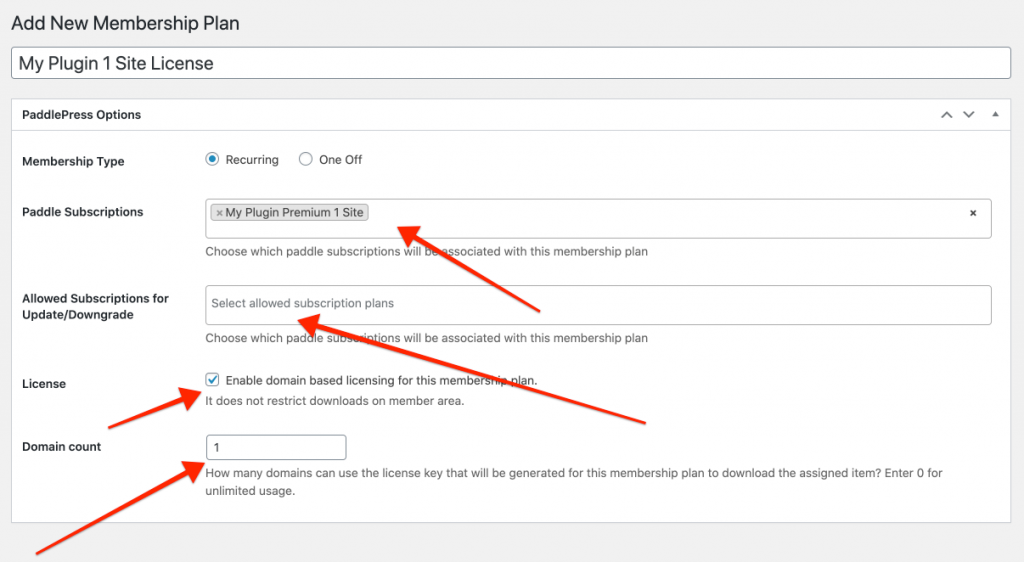
Membership is a custom post type that maintains the relation between content and paddle plan or product.
- Enter a membership plan title: It will be used internally to controlling download/content access.
- Choose membership type: Recurring for paddle plans, one-off means life-time access to your product.
- Paddle subscription plan: Assign multiple paddle subscription plans into a membership plan. (in case you want to create different plans for monthly subscription vs yearly subscription)
- (Optional) If you enabled self-service subscription upgrade/downgrade you need to map available plans in that section.
- License: enable licensing for this particular plan
- Enter domain count: (Enter “0” for unlimited usage) Learn more about how does domain count.
5) Release your Product #
Follow-up releasing a new product guide.
And that’s all!